Vegan Biscoff Caramel Brownies (GF-Option)
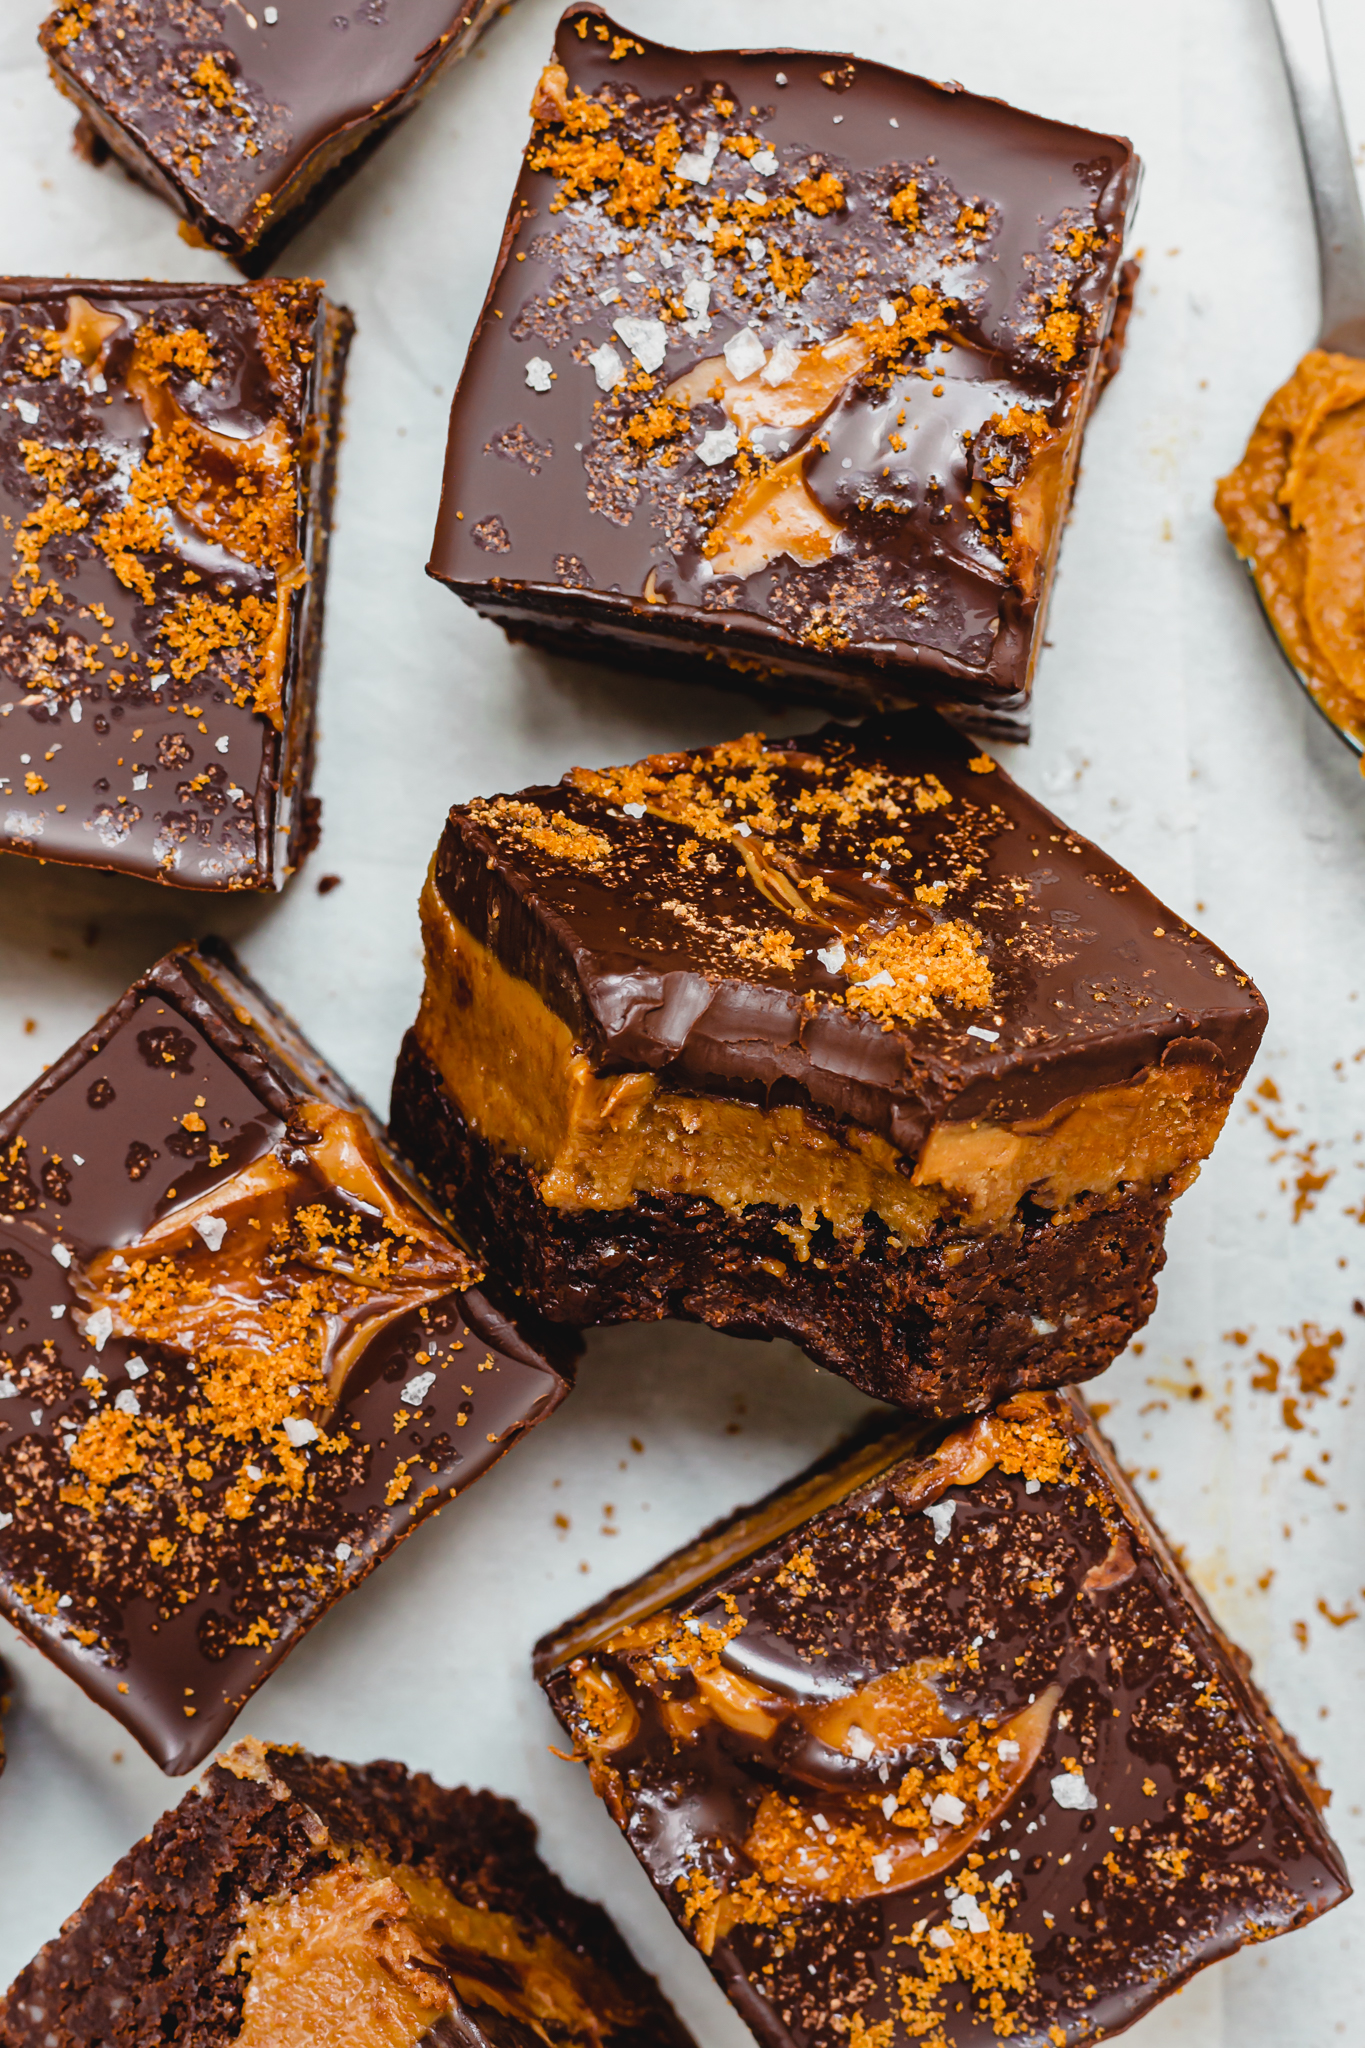
These are the ultimate Vegan Biscoff Caramel Brownies with a fudgy brownie base, a thick layer of Biscoff caramel and a dark chocolate top. Make these decadent brownies in a few steps with nut-free and gluten-free options.
Say hello to your new favourite Biscoff recipe. The cookie butter known as Biscoff is well-loved among the vegan scene as it is accidentally vegan and does not contain milk or dairy (like many other cookies and spreads). You can find other brands, too, who making speculoos or cookie butter, so you can use whatever you have to hand. The flavour is sweetly spiced, just like cookies and lends such a delicious texture to the brownies and caramel layers.

Why will I love these brownies?
These brownies will become your new favourite, they are:
- Rich, chocolatey and fudgy
- Decadent, indulgent and packed with cookie flavour
- Made with 3 delicious layers
- Fully vegan with gluten-free and nut-free options
- Lighter and more wholesome than your average brownie
- Great to make ahead of time
- Delicious for sharing desserts or teatime snacks
If you already love the sound of these brownies, then skip ahead to the recipe card below. Or, first let’s discuss the recipe in more detail.


What ingredients do I need?
The ingredient list may seem long at first, that’s only because there is a lot of overlap between the three layers: the brownie base; the caramel middle and the chocolate top.
Here’s what we need:
- Dark chocolate: this is for both the brownie base and the chocolate top. I like to use a dark chocolate with 70% min cacao but you can use any chocolate. Use chocolate chips or a bar, chopped up small.
- Vegan butter: the block kind of butter will lend the best flavour and texture but I am sure that vegan margarine will work. I have not tried these with coconut oil for the base, but I assume it will work.
- Aquafaba: this is our egg replacer in the base of the bars. It holds the brownies together and creates a lovely chewy fudgy texture. aquafaba is the water from a tin of chickpeas, so next time you use chickpeas, save the liquid for brownies.
- Biscoff cookie butter: this is in all the layers of the brownies, sometimes smooth and sometimes crunchy to create more texture. You can use the branded Lotus Biscoff cookie butter or I love the KoRo Speculoos butter, or use something similar like granola butter. See below for gluten-free options.
- Sugar: for the brownies, this recipe uses caster and light brown sugar which creates a lovely shiny, crackly top and rich flavour. if you prefer, you can swap this for all coconut sugar, although the texture may vary slightly, but they will still be delicious.
- Vanilla essence and salt: for flavour.
- Plain or GF plain flour: this is for the brownie base which is baked (unoike the other two layers). Use a gluten-free flour blend that is a recommended 1:1 swap if making these gluten-free.
- Cocoa powder: to make the brownies really delicious and chocolatey. Cocoa powder or cacao powder are fine here, although it’s often better to use cocoa powder as it’s more acidic and creates a better structure.
- Cashew or almond butter: for the caramel middle, I rely on my cheats’ no-bubble caramel. Both butters will create a delicious caramel, but you can also use peanut butter or try tahini or sunflower seed butter to make these bars nut-free.
- Coconut oil: for the caramel. This creates the perfect texture that holds together well but allows your teeth to sink in to the bars. I do not recommend swapping this.
- Maple syrup: this is also for the caramel to create a lovely sticky sweet layer. Other syrups like agave will also work.
- Biscoff cookies: or you can use similar speculoos or ginger nut cookies (gluten-free, where needed) to add crunch.


How do I make these?
These brownies are made in three stages for the three layers:
- Make the brownies: whisk together the melted chocolate and wet ingredients before stirring in the dry ingredients. Spread into the loaf pan and bake till shiny on top.
- Allow the brownies to cool fully: you can make these the day before and chill in the fridge overnight.
- Whisk together the caramel ingredients and fold in the cookies: spread over the cooled brownies.
- Top with a layer of crunchy Biscoff butter: for another gooey layer.
- Pour over the melted chocolate: and swirl on more cookie butter and top with crushed cookies.
- Allow to set the slice into bars or squares: and enjoy.


Are these gluten-free and nut-free?
These brownies are easily nut-free, just check all your ingredients (like chocolate and vegan butter) and use tahini or sunflower seed butter for the caramel. To make these brownies gluten-free, you will have to use a gluten-free version of Biscoff cookie butter. You can use a granola butter (which are often gluten-free) or use almond butter throughout and add a pinch of mixed spice into all the layers for a similar flavour.
How long will they last?
These will keep for 5 days in a sealed container or can be frozen for up to 1 month. Allow to defrost at room temperature.

What else can I make?
If you are looking for more brownie’s, bakes and bars, how about my:
- Vegan Snickers Caramel Brownies
- Triple Chocolate Vegan Fudge Brownies
- Pecan Peanut Butter Cup Frosted Brownies
- Chocolate Raspberry Fudge Bars
- Chocolate Chip Brownie Cookie Bars

Vegan Biscoff Caramel Brownies
These are the ultimate Vegan Biscoff Caramel Brownies with a fudgy brownie base, a thick layer of Biscoff caramel and a dark chocolate top. Make these decadent brownies in a few steps with nut-free and gluten-free options.
Ingredients
For the Brownie Base:
- 60g dark chocolate, chopped small
- 40g vegan butter
- 3 tbsp aquafaba
- 30g Biscoff cookie butter, smooth
- 65g caster sugar
- 25g light brown sugar
- ½ tsp vanilla essence
- 30g plain or GF plain flour
- 10g cocoa powder
- A pinch of salt
For the Biscoff Caramel Layers:
- 45g cashew or almond butter, smooth
- 1 ½ tbsp coconut oil
- 1 ½ tbsp maple syrup
- 30g Biscoff cookies, crushed to a fine crumb
- 100g Biscoff cookie butter
For the Topping:
- 100g dark chocolate, chopped small
- 1 tbsp coconut oil
- 2 tbsp Biscoff cookie butter, smooth
- 1 tbsp crushed Biscoff cookies
Instructions
- Preheat the oven to 160Fan/180*C and line a 9x5-inch loaf tin with parchment paper.
- For the brownie base: melt together the chocolate and butter till glossy and allow to cool for 5 minutes. To a mixing bowl add the aquafaba, Biscoff cookie butter, both sugars and the vanilla. Pour over the melted chocolate mix and whisk till smooth and shiny. Add in the flour, cocoa powder and salt and whisk to a thick, smooth batter. Pour into the loaf tin and smooth over the top.
- To bake: place in the oven for 21 minutes, until bubbling and crinkly on top and allow to cool in the loaf tin. Press down any areas of the brownie that have puffed up. The brownie must cool down fully before moving to the next stage (you can place it in the fridge if needed).
- Make the caramel layer: add the cashew or almond butter to a bowl with the coconut oil, maple syrup and salt and whisk till smooth. Add in the crushed cookies and stir. Pour over the brownie base and spread out evenly. Chill in the fridge for 30 minutes, till set.
- For the second caramel layer: warm the Biscoff cookie butter spread to make it runnier then spread over the caramel layer and chill again for 10 minutes.
- For the chocolate top: melt together the chocolate and coconut oil till glossy and pour over the Biscoff layer. Add on the Biscoff spread and swirl through to make patterns before sprinkling with Biscoff cookies and allowing to set in the fridge for 1 hour.
- To serve: remove the brownies from the tin and using a hot, sharp knife, slice into 8 squares.
- To store: keep for 5 days in a sealed container or in the freezer for up to 1 month.
Notes
Biscoff cookie butter is not gluten-free, so make sure to read the swaps above and use a nut/seed butter with 1/2 tsp of cinnamon or mixed spice for each section.
Recommended Products
As a brand ambassador and affiliate, I may earn commission from links.
I look forward to hearing what you think of these Vegan Biscoff Caramel Brownies so please let me know in the comments below and a star review above. If you do make these brownies, I’d love to see so please tag me, I’m @nourishing.amy on Instagram and use the hashtag #nourishingamy. I’m also on Twitter, Facebook and Pinterest – please say hello!
With Biscoff brownie love x


