
Chocolate Gingerbread Caramel Chestnut Cheesecake (Vegan No-Bake)
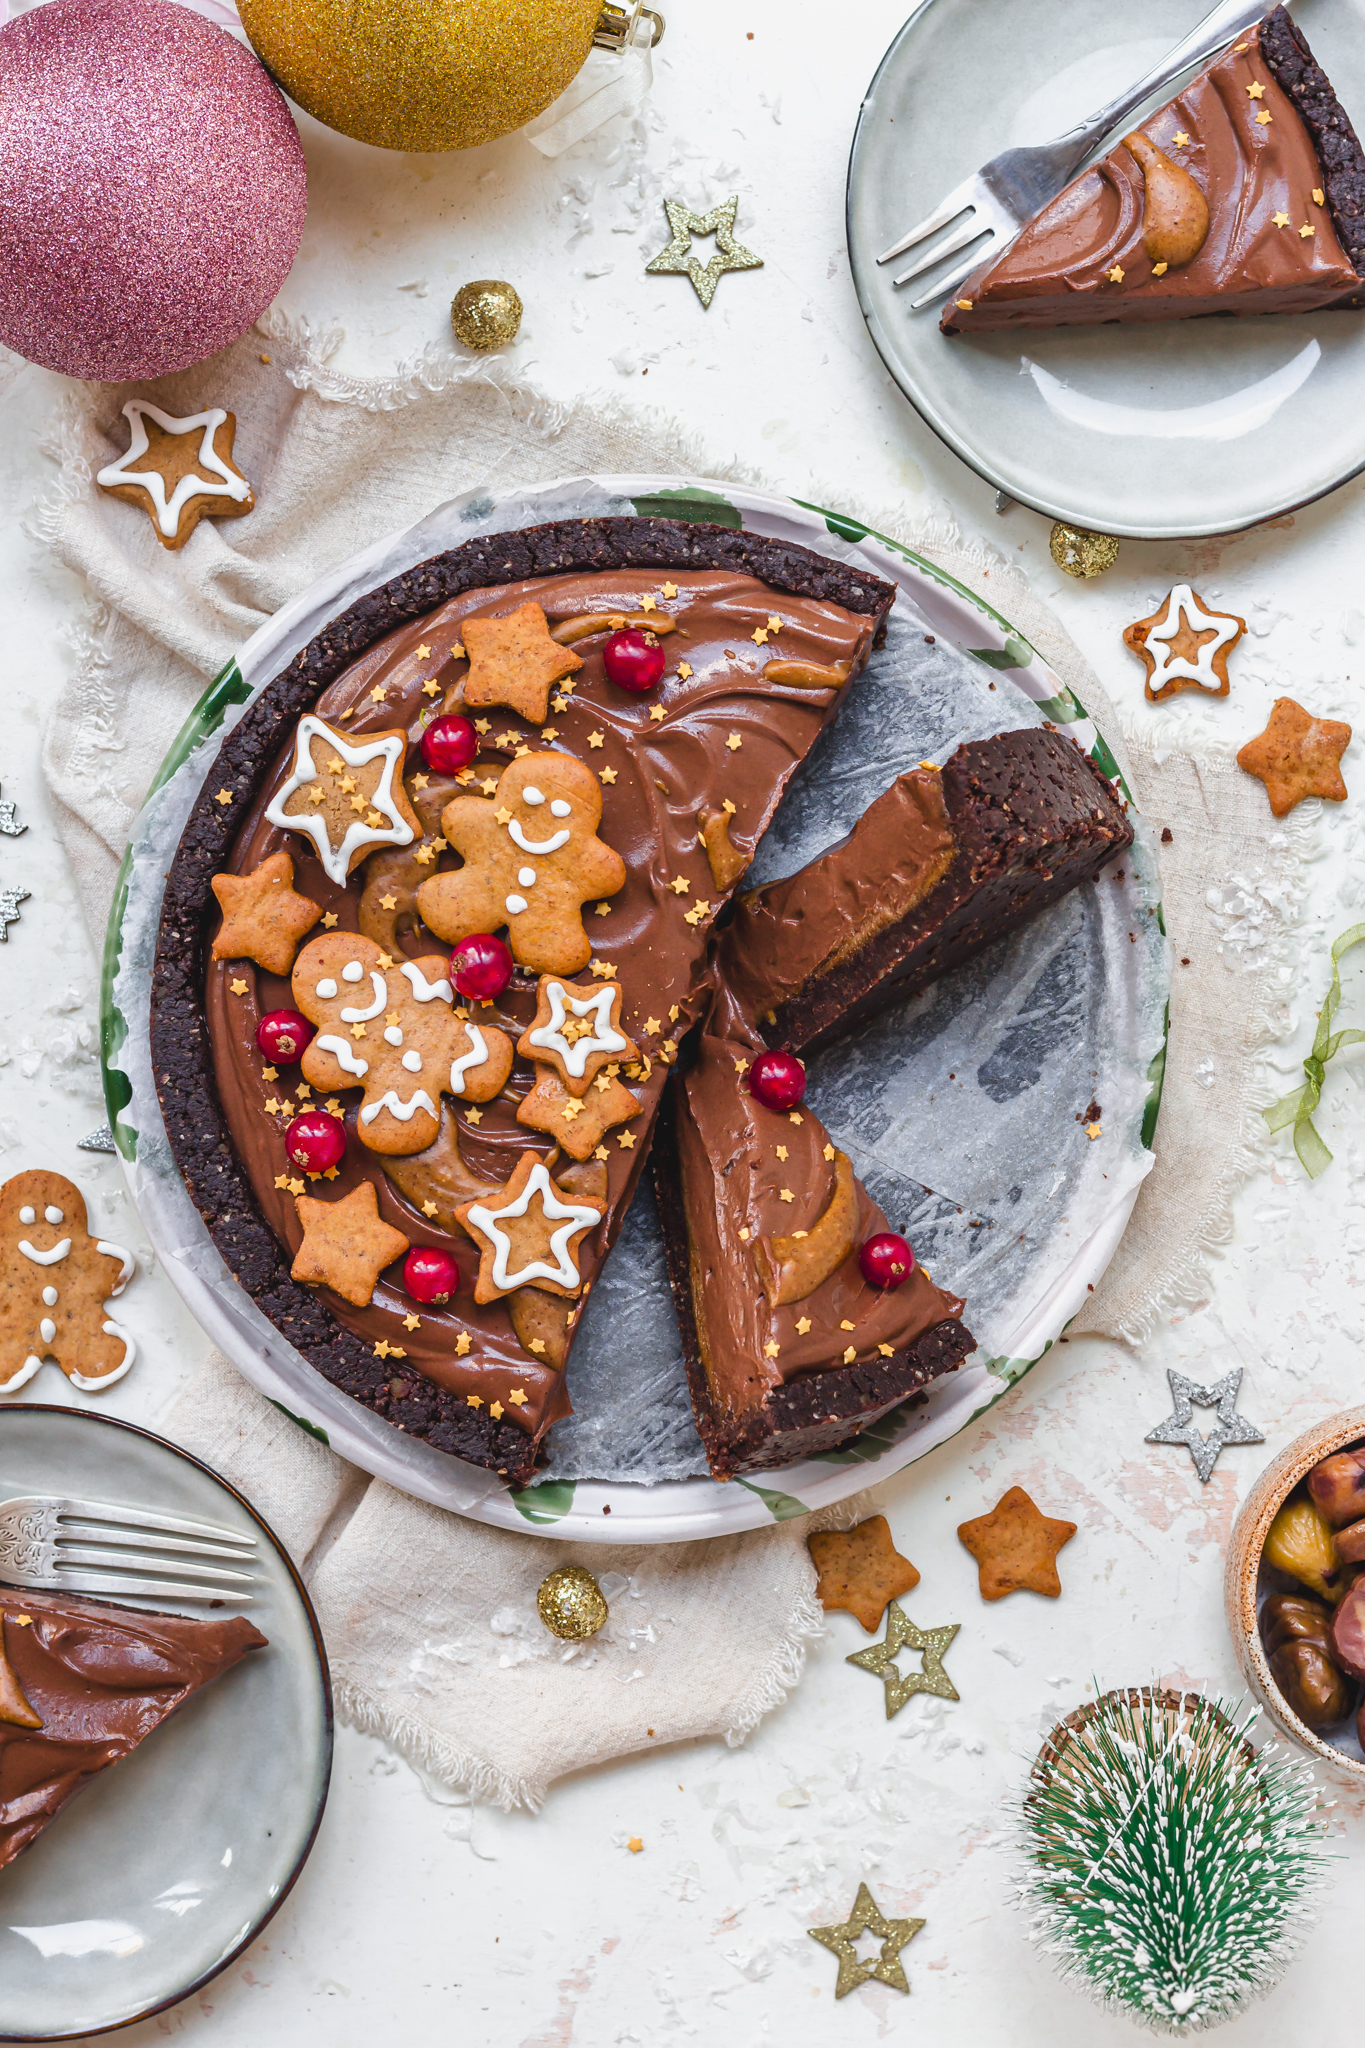

This Chocolate Gingerbread Caramel Chestnut Cheesecake is deliciously silky smooth, chocolatey and packed with gingerbread spices and lots of homemade caramel. It requires no baking, is naturally gluten-free, vegan and indulgent.
If you are looking for a showstopper Christmas dessert to share over the holidays then this cheesecake is it. This dessert will really wow your guests, loved ones and friends and the best part is that you can prepare it all the day before in just a few steps. It is rich, chocolatey, warmingly spiced and loaded with better-for-you plant-based ingredients which is great for all the family. It has a no-bake chocolate cookie base use roasted chestnuts for a real Christmassy feel as well as lots of gingerbread spices and a rich chocolate mousse-like cheesecake filling. it’s heaven in every slice.

Why will I love this?
This cheesecake is divine:
- Chocolatey, silky smooth and indulgent
- Caramel-y, gingerbread-y and loaded with seasonal spices
- Made from whole-food plant-based ingredients
- Requires no baking or fancy equipment
- Great for feeding a crowd
- Can be made the day before in advance
- Naturally vegan, egg-free and dairy-free
- Gluten-free, high in fibre and goodness
- Has three layers of deliciousness
- Melts in your mouth
- A great alternative for Christmas Day dessert
- Also delicious throughout the year (minus gingerbread cookies)
- Child and adult friendly
If you already love the sound of this dessert then skip ahead to the recipe card below. Or, first let’s discuss the recipe in more detail.


What ingredients do I need?
The ingredients are in the recipe card below with weights and more info and you can see my favourites in the “shop the recipe” section.
For the base:
- Whole roasted chestnuts: these are from Merchant Gourmet and they are my go-to throughout the holiday time for sweet and savoury recipes. they are pre-roasted and perfect for making a sweet, nutty and delicious wholesome cheesecake base.
- Oat flour or ground almonds: either will work here to act as a flour to help the base bind together.
- Cocoa powder: or you can use cacao powder to make the base chocolatey.
- Almond butter: this makes the base nutty, sweet and delicious and is great for binding the mix. Other nut or seed butters will work like cashew or sunflower seed butter.
- Maple syrup: for sweetness. You can also use agave or another syrup.
- Coconut oil: this helps to set the base firm enough to slice but still tender.
For the caramel we use similar ingredients:
- Almond butter: smooth is best here.
- Coconut oil: to help it set perfectly.
- Maple syrup: swaps as above.
- Gingerbread spices: ginger and cinnamon with a pinch of salt.

For the cheesecake mousse:
- Dark chocolate: I like a 80% dark chocolate but you can use lighter like 70% or use dairy-free milk chocolate. It can be a bar, chips or buttons as it’s melted down.
- Silken tofu: this is the magic ingredient that makes this cheesecake high in protein and really creamy, as well as creating the perfect texture. It’s firm enough to set but silky smooth to slice.
- Vegan cream cheese: this adds the classic cheesecake tang and just so delicious and makes it really creamy. You can also use thick coconut or dairy-free natural yoghurt.
- Cocoa powder: or cacao powder.
- Maple syrup: for sweetness.
- Vanilla and gingerbread spices: ginger, cinnamon and nutmeg.
To decorate, I add on some gingerbread cookies and redcurrants for a pop of colour.
Is this gluten-free and nut-free?
Yes this is naturally gluten-free as long as your oat flour is gluten-free. To make this nut-free, use a different cheesecake base (like this one without chestnuts) and use tahini or sunflower seed butter instead of almond butter throughout and please check all of your ingredients for nuts.


How do I make this?
This is easy to make in a few steps:
- Blend together the base ingredients: and press into a line round tin.
- Whisk together the caramel ingredients: and pour over the base. Set in the fridge until firm to touch, about one hour.
- Blend together all the cheesecake ingredients: and spin into the tart.
- Set in the fridge for 4 to 6 hours or overnight: and then carefully remove from the tin.
- Decorate with the leftover caramel and gingerbread cookies: and slice.
How long will it last?
This will keep for 1 week in the fridge, in a sealed container or covered tightly, but the cookies on top will soften over time, so it’s best to add those the day of serving. You can also freeze this for 1 month, wrapped well, and allow to defrost before slicing.

What else can I make?
If you are looking for other festive desserts:
- Gingerbread White Chocolate and Pear Cake Slices
- No Bake Pumpkin Chocolate Cheesecake
- Vegan Chocolate Star Bread
- Chocolate Christmas Pudding Bomb
- Best Vegan Chocolate Swiss Roll

Chocolate Gingerbread Caramel Chestnut Cheesecake (Vegan No-Bake)
This Chocolate Gingerbread Caramel Chestnut Cheesecake is deliciously silky smooth, chocolatey and packed with gingerbread spices and lots of homemade caramel. It requires no baking, is naturally gluten-free, vegan and indulgent.
Ingredients
For the Base:
- 180g whole pre-roasted chestnuts
- 25g oat flour or ground almonds
- 20g cocoa powder
- 100g smooth almond butter
- 2 tbsp (30ml) maple or agave syrup
- 2 tbsp (30ml) melted coconut oil
For the Gingerbread Caramel:
- 100g smooth almond butter
- 1 ½ tbsp melted coconut oil
- 3 tbsp maple or agave syrup
- 1 tsp cinnamon
- 1 tsp ginger
- A pinch of salt
For the Chocolate Cheesecake:
- 150g dark chocolate, chopped small
- 200g silken tofu, drained weight
- 150g vegan cream cheese or thick coconut yoghurt
- 2 tbsp cocoa powder, sifted
- 60ml maple or agave syrup
- 1 tsp vanilla essence
- ½ tsp ground ginger
- ¼ tsp cinnamon
- A pinch of nutmeg
To Decorate:
- Gingerbread cookies and redcurrants
Instructions
- Line an 8-inch round loose-bottomed tin with parchment paper and grease the sides.
- Prepare the base: add all of the ingredients to a food processor and blend into a sticky sand-like mixture that holds together when pressed between your fingers. Pour the mix into the tin and press down firmly along the bottom and sides, making a compact case. Chill in the fridge while you carry on.
- For the caramel: whisk together all of the ingredients util smooth. Pour most of the caramel (save 3-4 tbsp for decoration) into the tin and smooth over. Chill in the fridge for 1 hour or until the caramel is firm to touch. Leave the other caramel sauce in a sealed container at room temperature for up to 1 week or in the fridge for 1 month (where it will firm up).
- For the cheesecake mousse: melt the chocolate in the microwave and allow to cool down slightly. Pour all of the cheesecake ingredients into a blender or food processor and blend until really smooth and creamy, taking 1-2 minute. Scrape down the sides as necessary before pouring on top of the caramel. Spread out the mixture and make swirls on top. Chill in the fridge overnight (covering tightly with clingfilm).
- When ready to serve: carefully remove the cheesecake from the tin. Spoon over the extra caramel sauce and decorate with gingerbread cookies, redcurrants and sprinkles.
- Slice and serve: and keep leftovers in the fridge for 1 week, wrapped well, or in the freezer for 1 month. Allow to defrost before eating.
Shop the recipe

Stay in touch
I look forward to hearing what you think of this Chocolate Gingerbread Caramel Chestnut Cheesecake so please let me know in the comments below and leave a star review above. If you do make this, I’d love to see so please tag me, I’m @nourishing.amy on Instagram and use the hashtag #nourishingamy. I’m also on Twitter, Facebook and Pinterest – please say hello!
With choc gingerbread chestnut love x
p.s. this recipe was first made with Merchant Gourmet who I love but this blog post is not sponsored and all opinions are my own.
 Skip to Recipe