
Peanut Butter Brownie Ice Cream Bars (Vegan Gluten-Free)
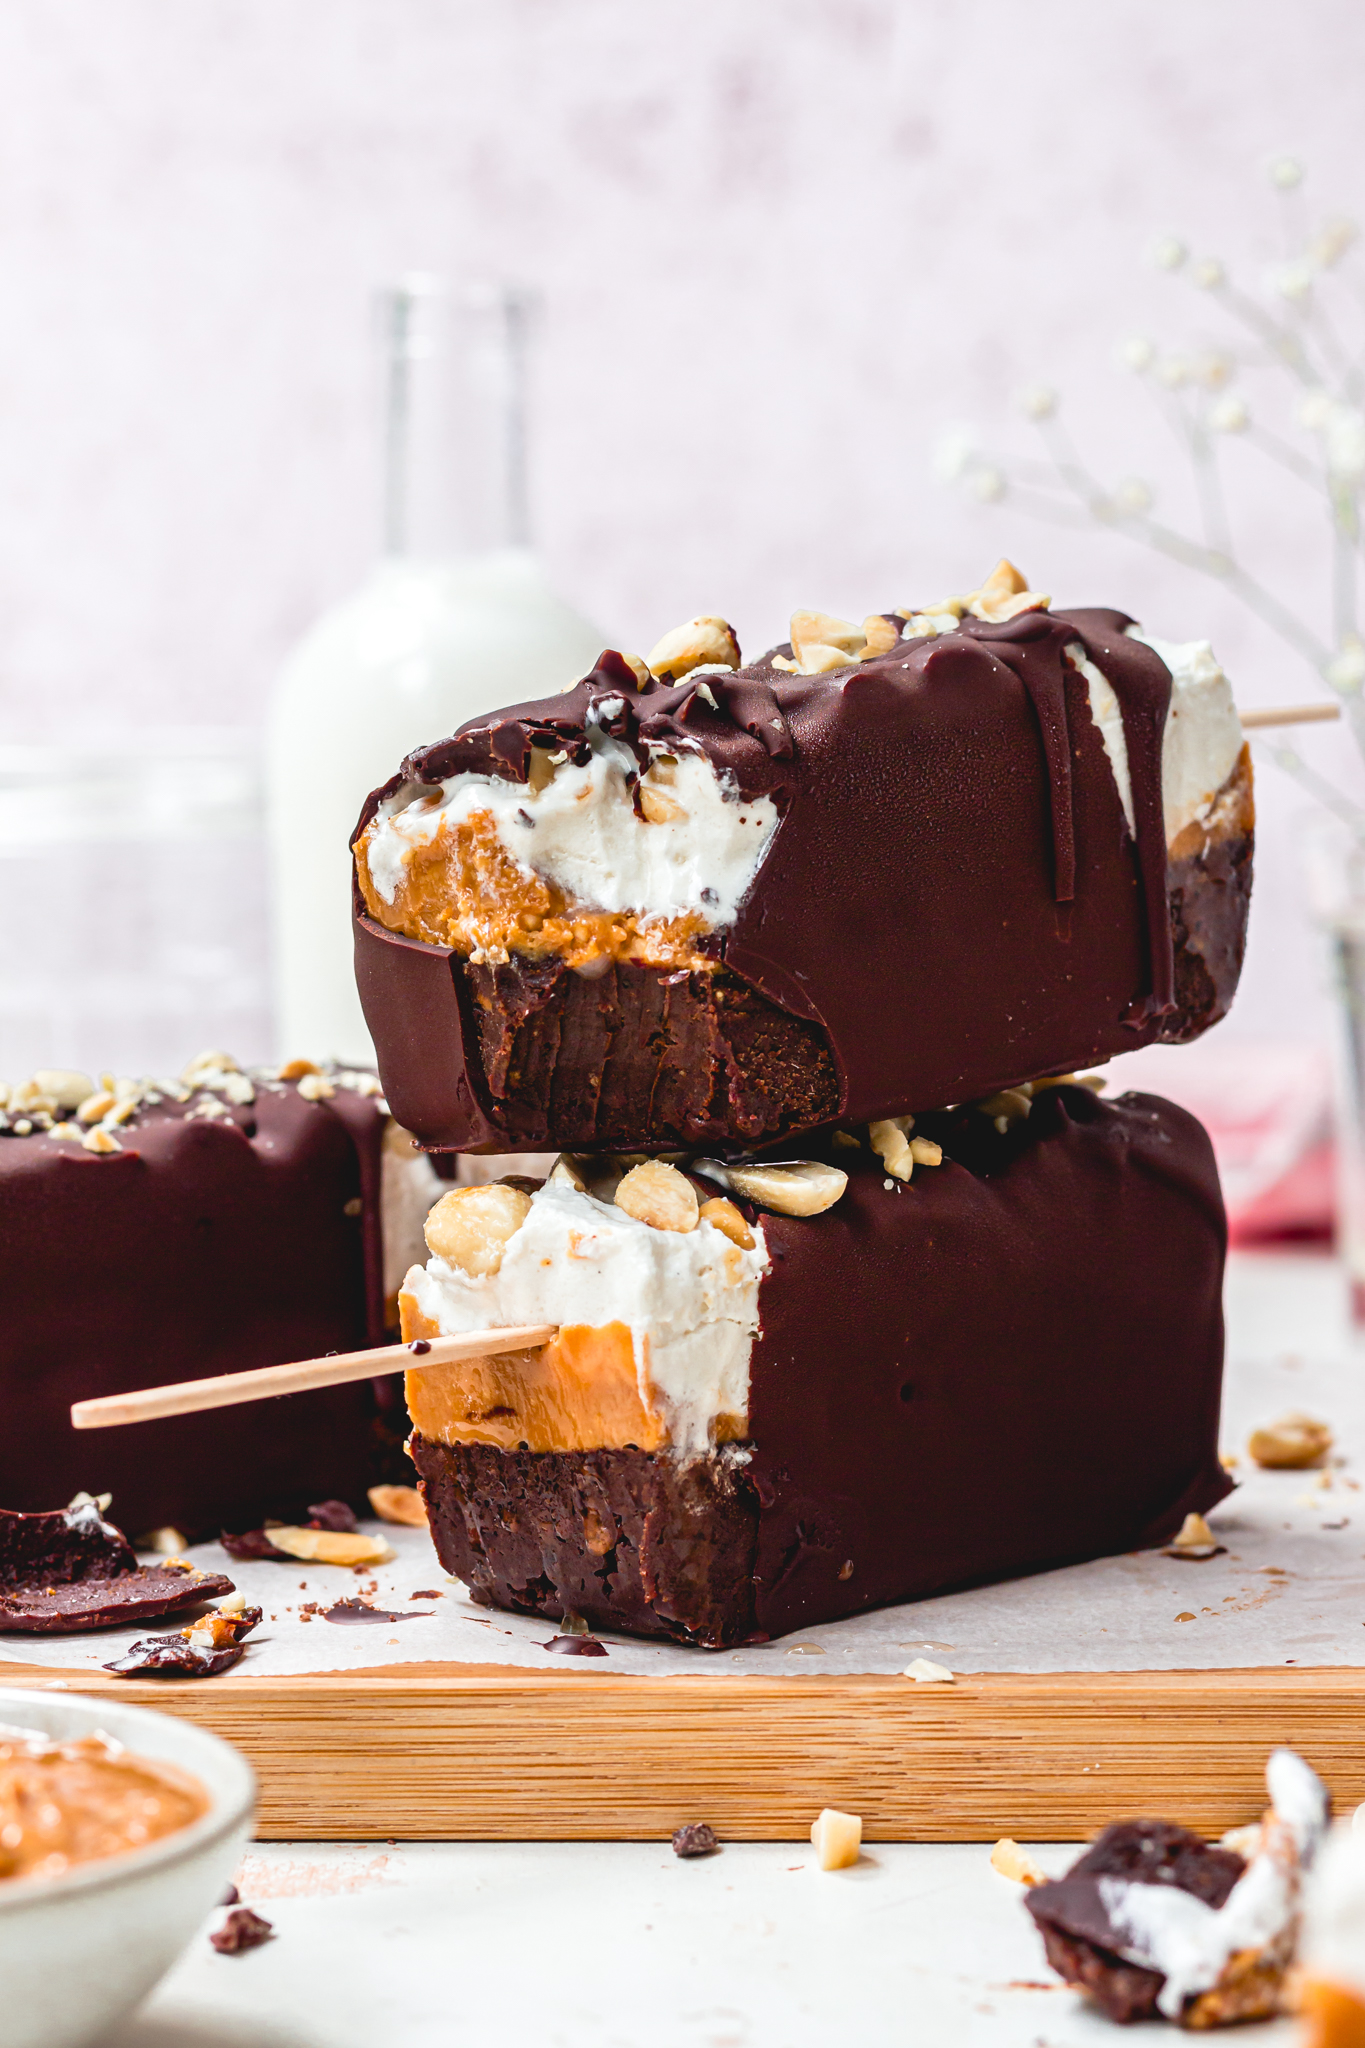

These rich and chocolatey Peanut Butter Brownie Ice Cream Bars have a no-bake brownie base topped with a thick layer or crunchy peanut butter and dairy-free ice cream with chopped peanuts. Dipped in dark chocolate, they’re vegan, gluten-free and summery staples.
If you love all things snickers, chocolate and ice cream, then these ice cream bars are going to be your new favourite things to make and eat this summer. They are so rich and chocolate, yet cooling creamy and smooth and rely on basic wholefood ingredients (plus some dairy-free ice cream). These ice creams require no-baking, and come together in one dish. They are great for all of the family, and really are a dessert to impress guests, family and friends.

Why will I love these?
These ice cream bars are:
- Chunky, crunchy and nutty
- Taste like snickers and ice cream in every bite
- Chocolatey, peanutty and so delicious
- Decadent, indulgent and rich
- Made with wholefood ingredients
- Naturally vegan, dairy-free and egg-free
- Gluten-free with nut-free options
- Require no baking
- Can be made with any ice cream (flavour options are endless)
- Come together in one dish
- Easy to make ahead of time
- Great for all the family
- Delicious for snacks and desserts
- Perfect in the summer and all year round
If you already love the sound of these ice cream bars, then skip ahead to the recipe card below. Or, first let’s discuss the recipe in more detail.


What ingredients do I need?
You can see the ingredients with weights in the recipe card, or see my favourites in the “shop the recipe”.
For the brownie base:
- Medjool dates: these are sticky, sweet and make for the best brownie mix. You can use other dates, as they are soaked in water to start, to rehydrate them.
- Smooth peanut butter: makes the base nutty and snickers-like. You can use other nut butters like almond or cashew, or see below for nut-free options.
- Coconut oil: to set the base.
- Cocoa powder: make sure this is unsweetened and 100% raw cocoa or use cacao powder, to make it really chocolatey.
- Salt: for flavour.
As for the filling:
- Crunchy peanut butter: I love the crunch this adds, but you can use smooth peanut butter, as above. Or see above also for other options.
- Dairy-free ice cream: use your favourite dairy-free vanilla ice cream for the filling. The key is to allow it to soften and start to melt so you can spread it on top of the brownies. You can also use a flavoured ice cream like chocolate, salted caramel or vegan honeycomb, to change the flavours.
- Chopped peanuts: for added crunch on top.


As for the chocolate coating:
- Dark chocolate: I use a 70% dark chocolate, from Divine, which I love as it balances out the sweetness of the ice cream, but you can use other dark or dairy-free milk chocolate, too.
- Coconut oil: helps the chocolate to set faster and making it less likely to crack.
- Extra peanuts: for decorating.
Are these gluten-free and nut-free?
These are gluten-free (please check your ice cream) and to make these nut-free, swap the peanut butter for tahini or sunflower seed butter and swap the peanuts for sunflower seeds. Note that these will not taste like snickers anymore, but they will be delicious. For other nut options instead of peanuts, use almonds or cashews.


How do I make them?
These are ready to make in a few steps:
- Blitz together the brownie ingredients: until squidgy and holding togegher.
- Press into a lined loaf tin: to make an even base.
- Spread over the crunch peanut butter: to make the gooey middle.
- Spoon and spread over the ice cream: and smooth over the top.
- Press in the chopped peanuts: and wrap with clingfilm.
- Chill overnight in the freezer: so that the ice cream can properly re-set.
- Melt the chocolate: and pour in a glass or bowl.
- Slice the ice creams into bars and insert wooden sticks: this helps to dip into the chocolate.
- Dip in the chocolate and top with peanuts: and enjoy straight away.
How long will they last?
These will keep for 2-4 weeks in the freezer, wrapped up well but best enjoyed within the first week.

What else can I make?
For more ice cream ideas:
- Berry Cheesecake Magnum Ice Creams
- Peanut Butter Cookie Ice Cream Sandwiches
- Chocolate Cookie Dough Ice Creams
- Rocky Road Ice Cream
- Peanut Butter Protein Magnum Ice Creams

Peanut Butter Brownie Ice Cream Bars (Vegan Gluten-Free)
These rich and chocolatey Peanut Butter Brownie Ice Cream Bars have a no-bake brownie base topped with a thick layer or crunchy peanut butter and dairy-free ice cream with chopped peanuts. Dipped in dark chocolate, they’re vegan, gluten-free and summery staples.
Ingredients
For the Brownie Base:
- 200g medjool dates (pitted weight)
- 120g smooth peanut butter
- 1 tbsp coconut oil, softened
- 40g cocoa powder
- A pinch of salt
For the Layers:
- 100g crunchy peanut butter
- 300g dairy-free vanilla ice cream
- 50g chopped peanuts
For the Chocolate Coating:
- 180g dark chocolate, chopped small
- 1 tbsp coconut oil
- Chopped peanuts
Instructions
- Line a 9x5-inch loaf tin with parchment paper. Soak the dates in boiling water for 10 minutes. Remove the ice cream from the freezer to soften.
- Make the base: drain the dates and add them to a blender with all of the other base ingredients and pulse to a sticky mix that holds together when pressed between your fingers. Press down into the tin and to make a compact base.
- Spread over the peanut butter and smooth out to make an even filling.
- Scoop the softened ice cream into the tin and smooth out evenly. Press in all the chopped peanuts.
- Cover tightly with two layers of clingfilm and leave to rest in the freezer overnight (or 6-8 hours).
- To shape the bars: remove from the freezer and lift out the tin. Use a warmed, sharp knife to slice into 5 or 6 bars and insert a lolly stick into each on (in between the peanut butter and ice cream layer). Return to the freezer for 1 hour.
- For the chocolate coating: add the chopped chocolate and coconut oil to a heatproof bowl and warm until melted (in the microwave or over a double boiler aka bain-marie). Pour the chocolate into a large glass, tall and big enough to fit in the ice creams.
- Remove the ice cream bars from the freezer and work quickly to dip them into the chocolate, allowing the excess to drip off and then sprinkle over more peanuts. Repeat to coat all the bars.
- Eat straight away or cover tightly and keep in the freezer for 2-4 weeks although best eaten within the first week.
Notes
You can also slice these into squares to make 12 pieces and dip in the chocolate as above.
Shop the recipe

Stay in touch
I look forward to hearing what you think of these Peanut Butter Brownie Ice Cream Bars so please let me know in the comments below and leave a star review above. If you do make these, I’d love to see so please tag me, I’m @nourishing.amy on Instagram and use the hashtag #nourishingamy. I’m also on Twitter, Facebook and Pinterest – please say hello!
 Skip to Recipe